Shirohane's Animator - Controller Animator
In order to make use of the Controller animator layer for your unique model, full customization of the animation layer will most likely be necessary.
The following step-by-step instructions will go through how to setup the Controller Animation Layer highlighting key configuration features.
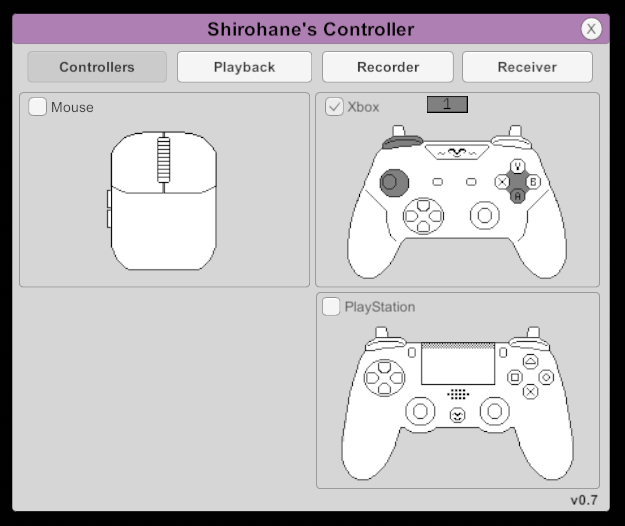
- Activate the “Shirohane Controller” plugin and start the “Xbox” or "PlayStation" to VNyan parameter converter.
- Load your avatar using the vNyan “Load Avatar” button.
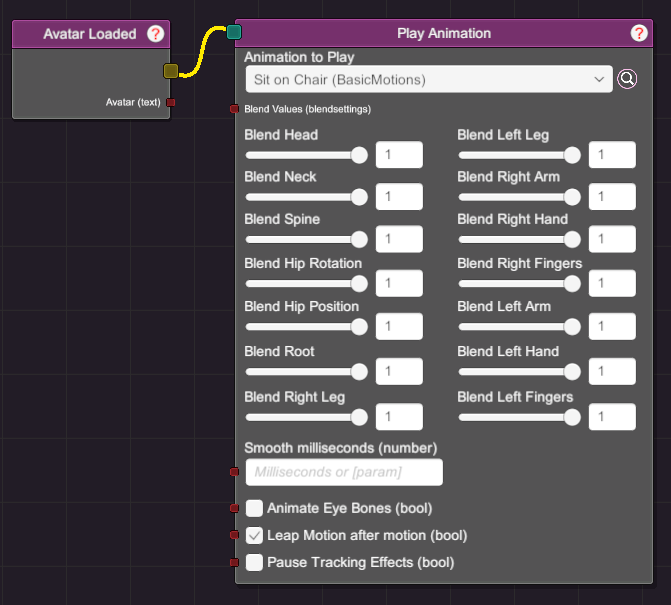
- (Optional) Start a sitting animation using the VNyan node graph. Connect an “Avatar Loaded” trigger to a “Play Animation” node. Remember to turn OFF “Pause Tracking Effect”, to enable tracking when the sitting animation is playing. Then activate the node, to move your Avatar into your selected animation.
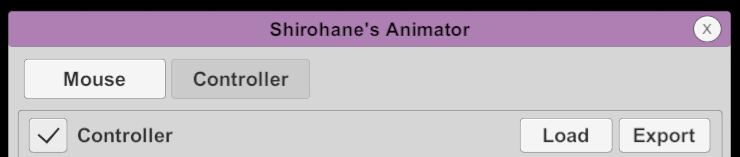
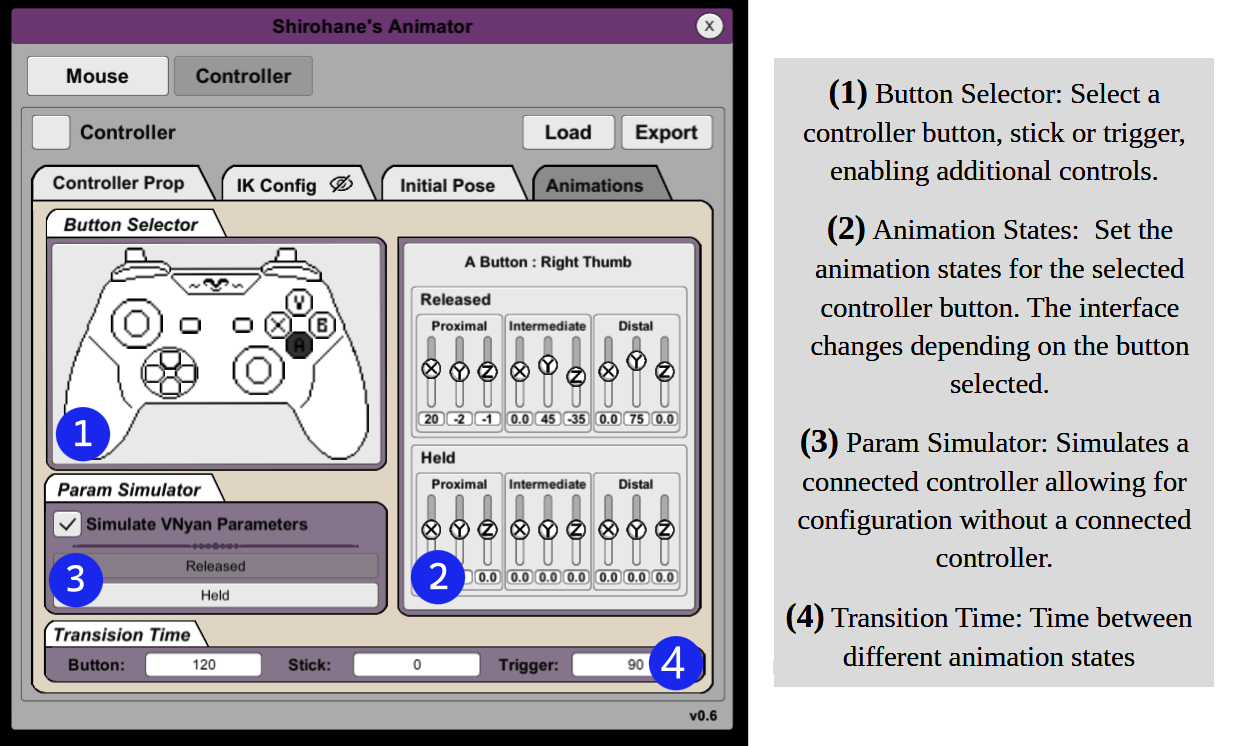
- Open the “Shirohane Controller Animator” plugin. Press the Controller button to display the controller layer settings. Next click the Controller toggle to start the controller animation layer.
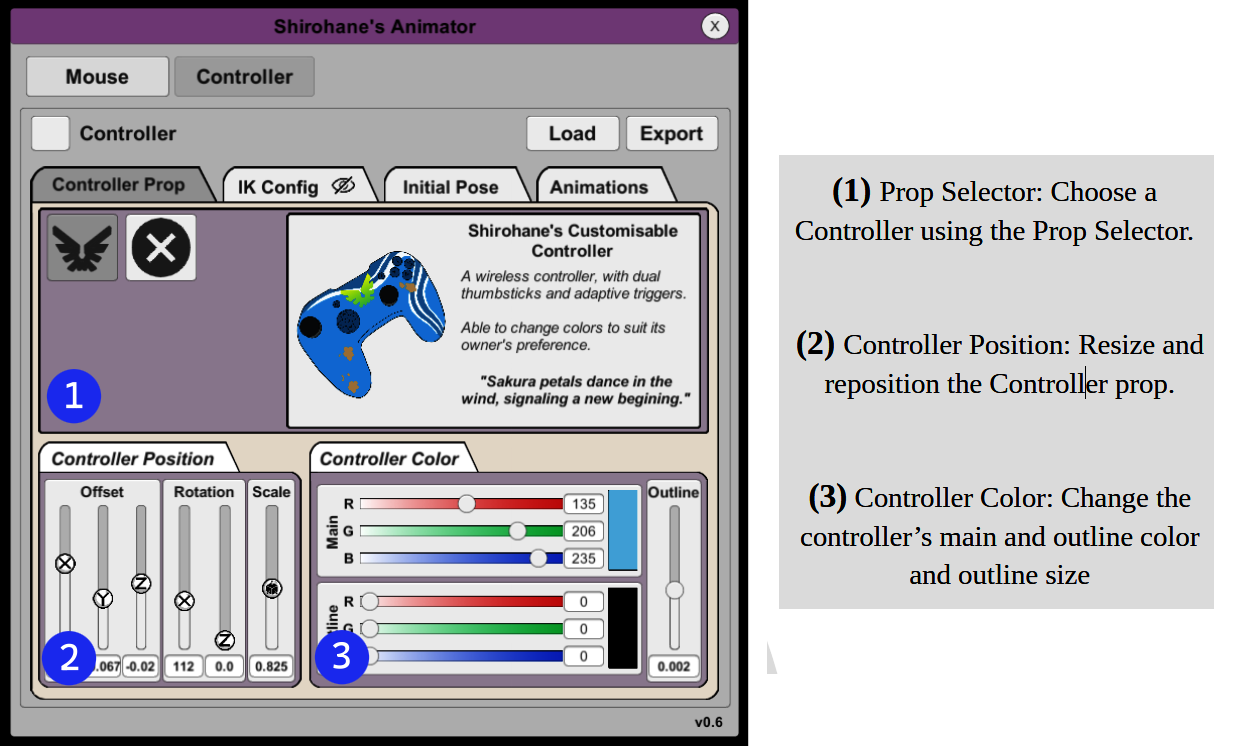
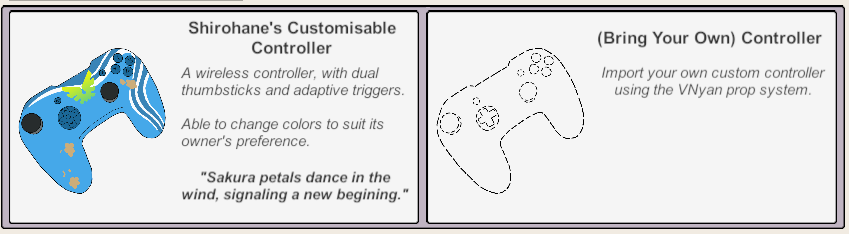
- Select the “Controller Prop” panel. Using this interface, you can: select a Controller Prop, control it’s position and color.
- Using the Prop Selector (1), choose a controller prop. Available controllers include:
- “Shirohane’s Customizable Controller” is a duel thumb-stick controller with adaptive triggers which can be re-colored.
- “(Bring your Own) Controller” removes the animator controller prop. See the developer manual for instructions to make your own vNyan controller prop.
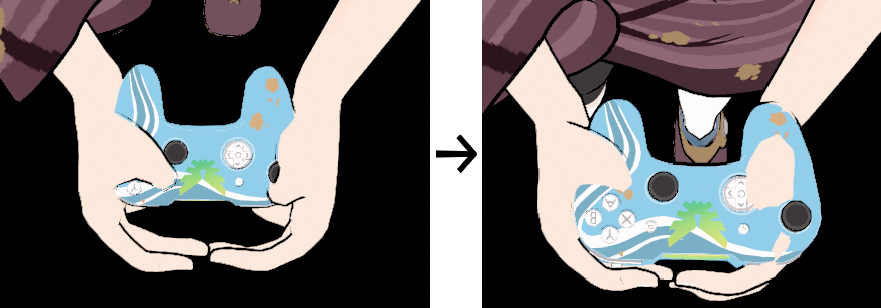
- Use the “Controller Position” control (2) to resize and position the controller prop so that the right bumper button lines up with the right hand index fingers.
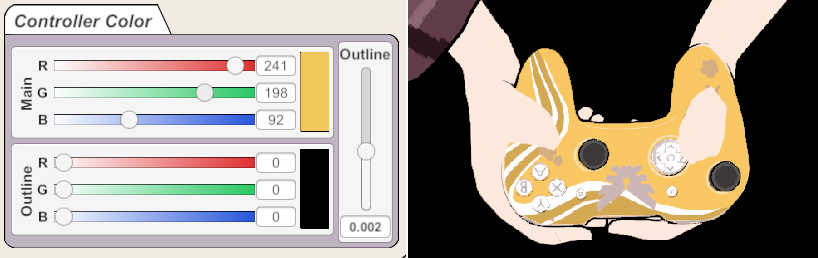
- Use the “Controller Color” panel (3) to change the controller color. Select the body and outline color using the color sliders. You can also change the size of the outline.
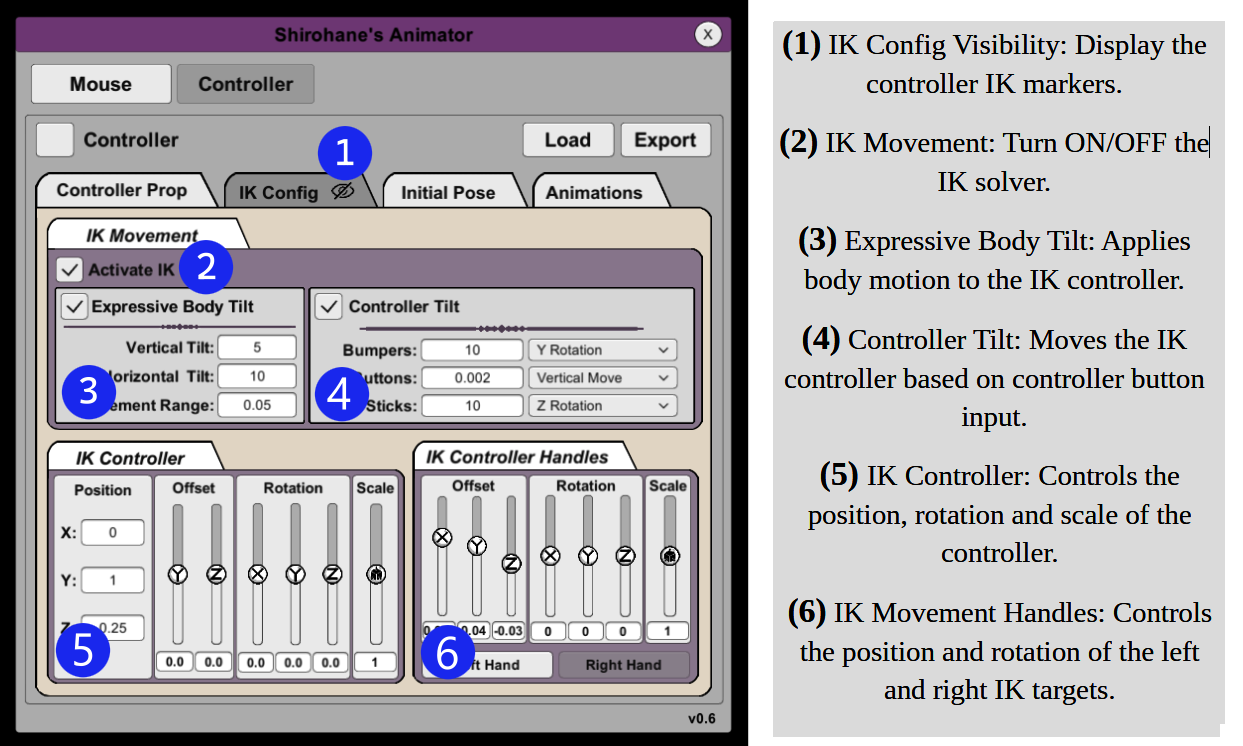
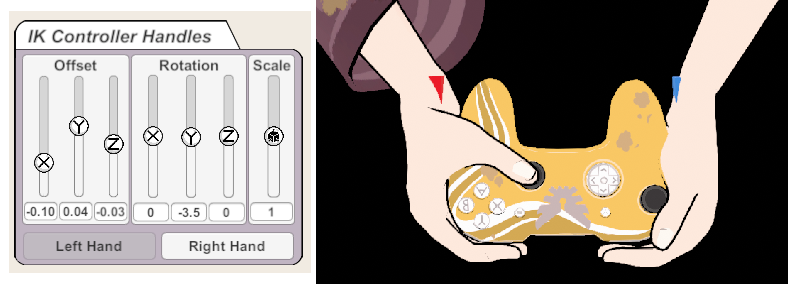
- Select the “IK Config” panel. Opening this panel will display the IK target markers which control the position of the hand and controller prop.
- Using the “IK controller” panel (5) position the IK targets, changing the height and angle of the controller to suit your model.
- The Position text-boxes can be used to make large changes to the position of the controller, then the offset sliders are used to make smaller adjustments.
- Rotation sliders control the angle of the controller, for example you can adjust the Y rotation to tilt the controller to face your avatar.
- The Scale slider controls the size of the IK markers, (Set this slider to the prop scale allowing for IK targets to match that of the prop).
- Using the “IK Controller Handles” (6) you can move the IK target of each individual hand.
- Press the left hand button, then use the offset sliders to move the left IK target so that your hand is no longer clipping through the controller. You can also use the rotation sliders to line up your hand with the controller handle.
- Adjust the “IK Movement” (2) settings. You can apply an “Expressive Body Tilt” and a “Controller Tilt” for more dynamic controller animations.
- “Expressive Body Tilt” moves and rotates the controller IK targets based on your avatars head movement. Use this setting in conjunction with vNyan’s inbuilt “Expressive Body Tilt” for dynamic movement. You can control how much vertical and horizontal tilt to apply to the controller, and how much the controller moves with your head rotation.
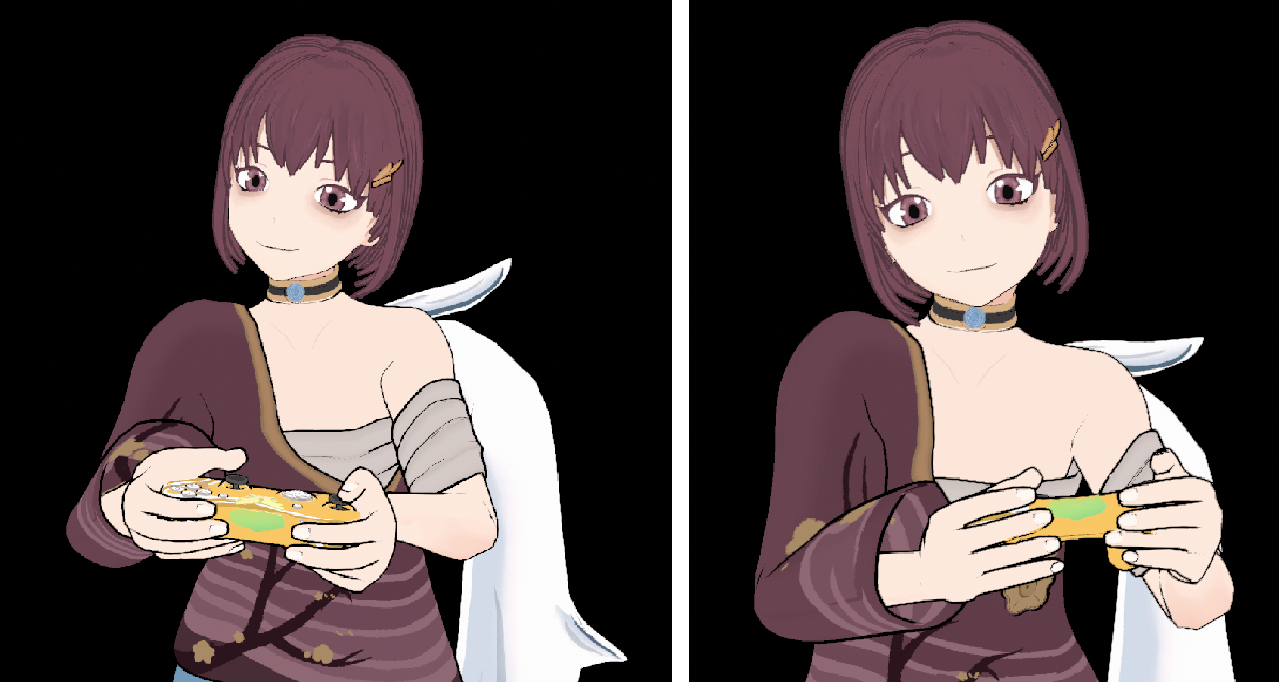
- The “Controller Tilt” setting will move the IK controller targets in response to button, stick or bumper input, allowing you to simulate force being applied to the controller. How the direction is applied differs depending on the type of motion selected.
• Rotation (X, Y and Z) and Horizontal Movement are mirrored depending of if a left or right button is pressed.
• Vertical Movement is applied in a single direction.
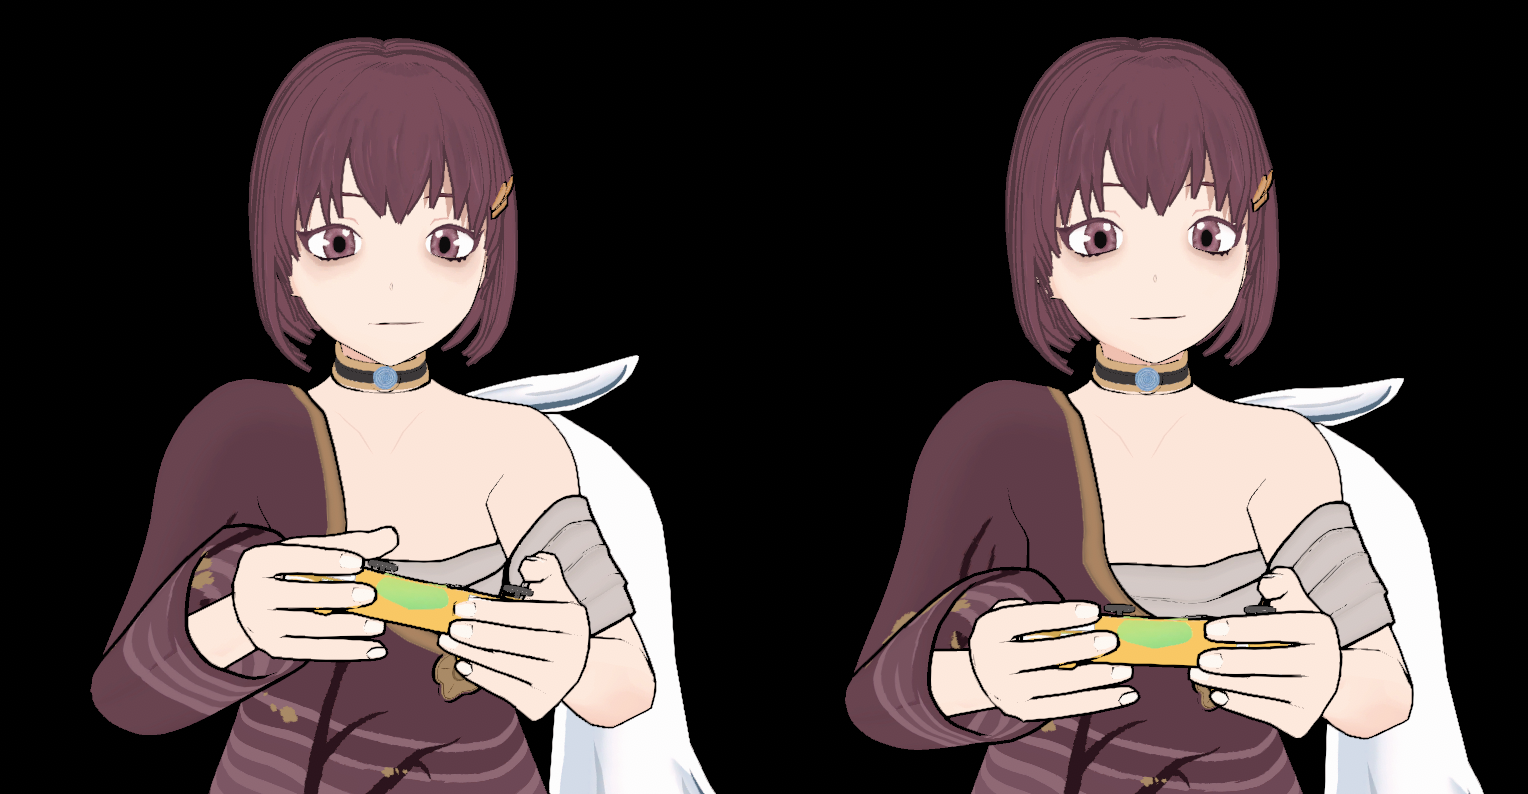
- Select the “Initial Pose” panel. Using these controls you can set the starting avatar pose. This pose occurs when the controller layer is started, but before the IK solver is activated.
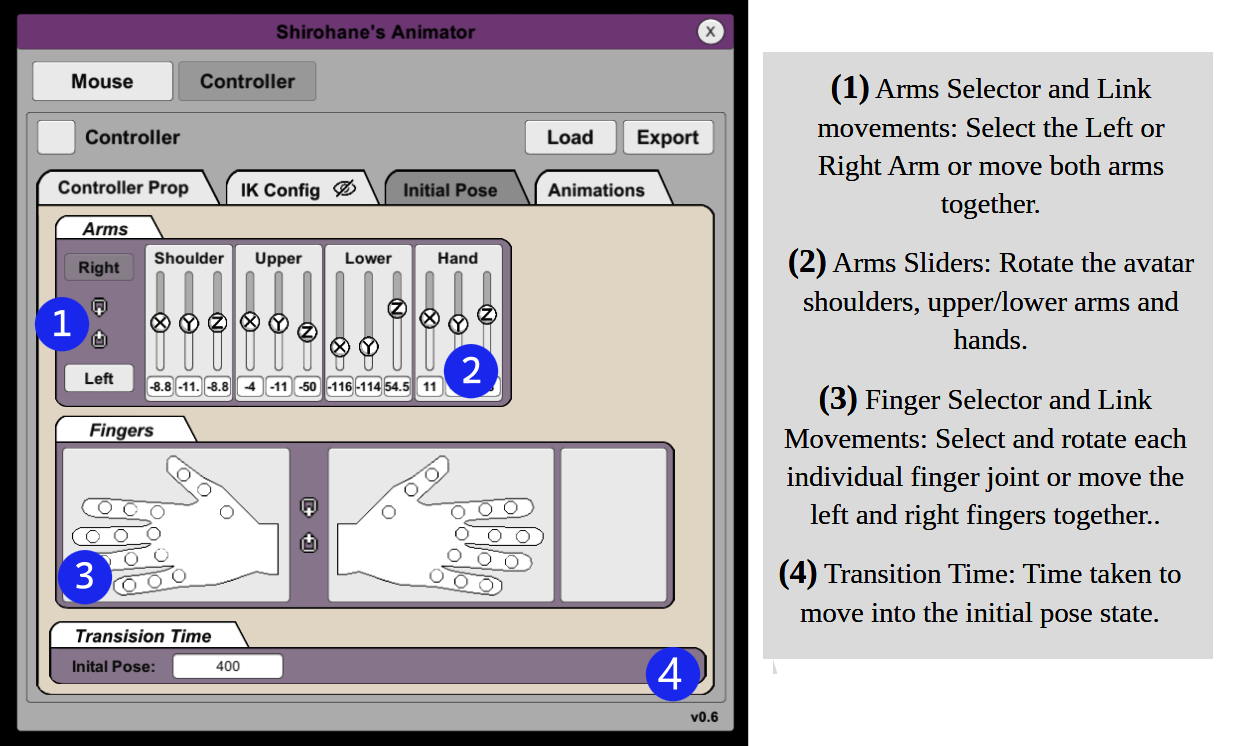
- Using the Arms Panel you can adjust the Left and Right arms of the Initial pose. Click the Left button to move the left arm, and the Right button to move the right arm. A link button can be pressed to move both arms at the same time in order to simply the setup process. (NOTE: The arm values are overwritten by the IK solver, so in order to view and configure the Initial Pose first disable the “IK Config>Activate IK” toggle).
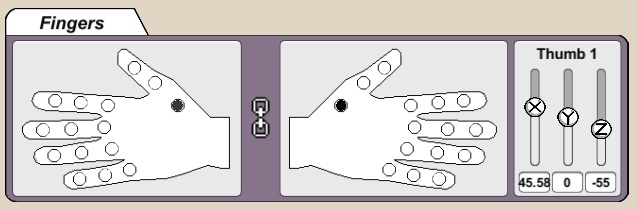
- Using the Fingers Panel you can control the default finger rotations of the avatar. Each finger joint can be rotated by the pressing the circle then using the sliders that appear. (NOTE: It is important to adjust the thumb, ring and little fingers using this interface, so that your avatar holds the controller naturally).
- Set the Transition time (in milliseconds) taken when moving to the initial pose state.
- Select the “Animations” panel. Using these controls you can customize the controller animation and transition times.
- Set the animation states for each controller button by clicking the controller image located in the “Button Selector” panel. Depending on the type of controller button that is selected, different UI are enabled which allow you to configure your avatar’s animation states. The following instructions detail the process of adjusting a controller animation.
- Use the “Param Simulator” to replicate controller movement (instead of using a connected controller). Activate this functionality using the “Simulate VNyan Parameters” toggle.
Depending on the selected button, one of three interfaces will be visible. • Buttons (Face Buttons, D-Pad, Start, Select or Bumpers): Use the Released or Held buttons to switch between the two different button states. • Stick (Left or Right Sticks): Use the Sliders to control the X and Y movements of the selected stick. Released and Held buttons switch between the thumb-stick (L3 and R3) pressed states. • Trigger (Left or Right Triggers): Use the Trigger Strength slider to control how much force is being applied to the left and right trigger.
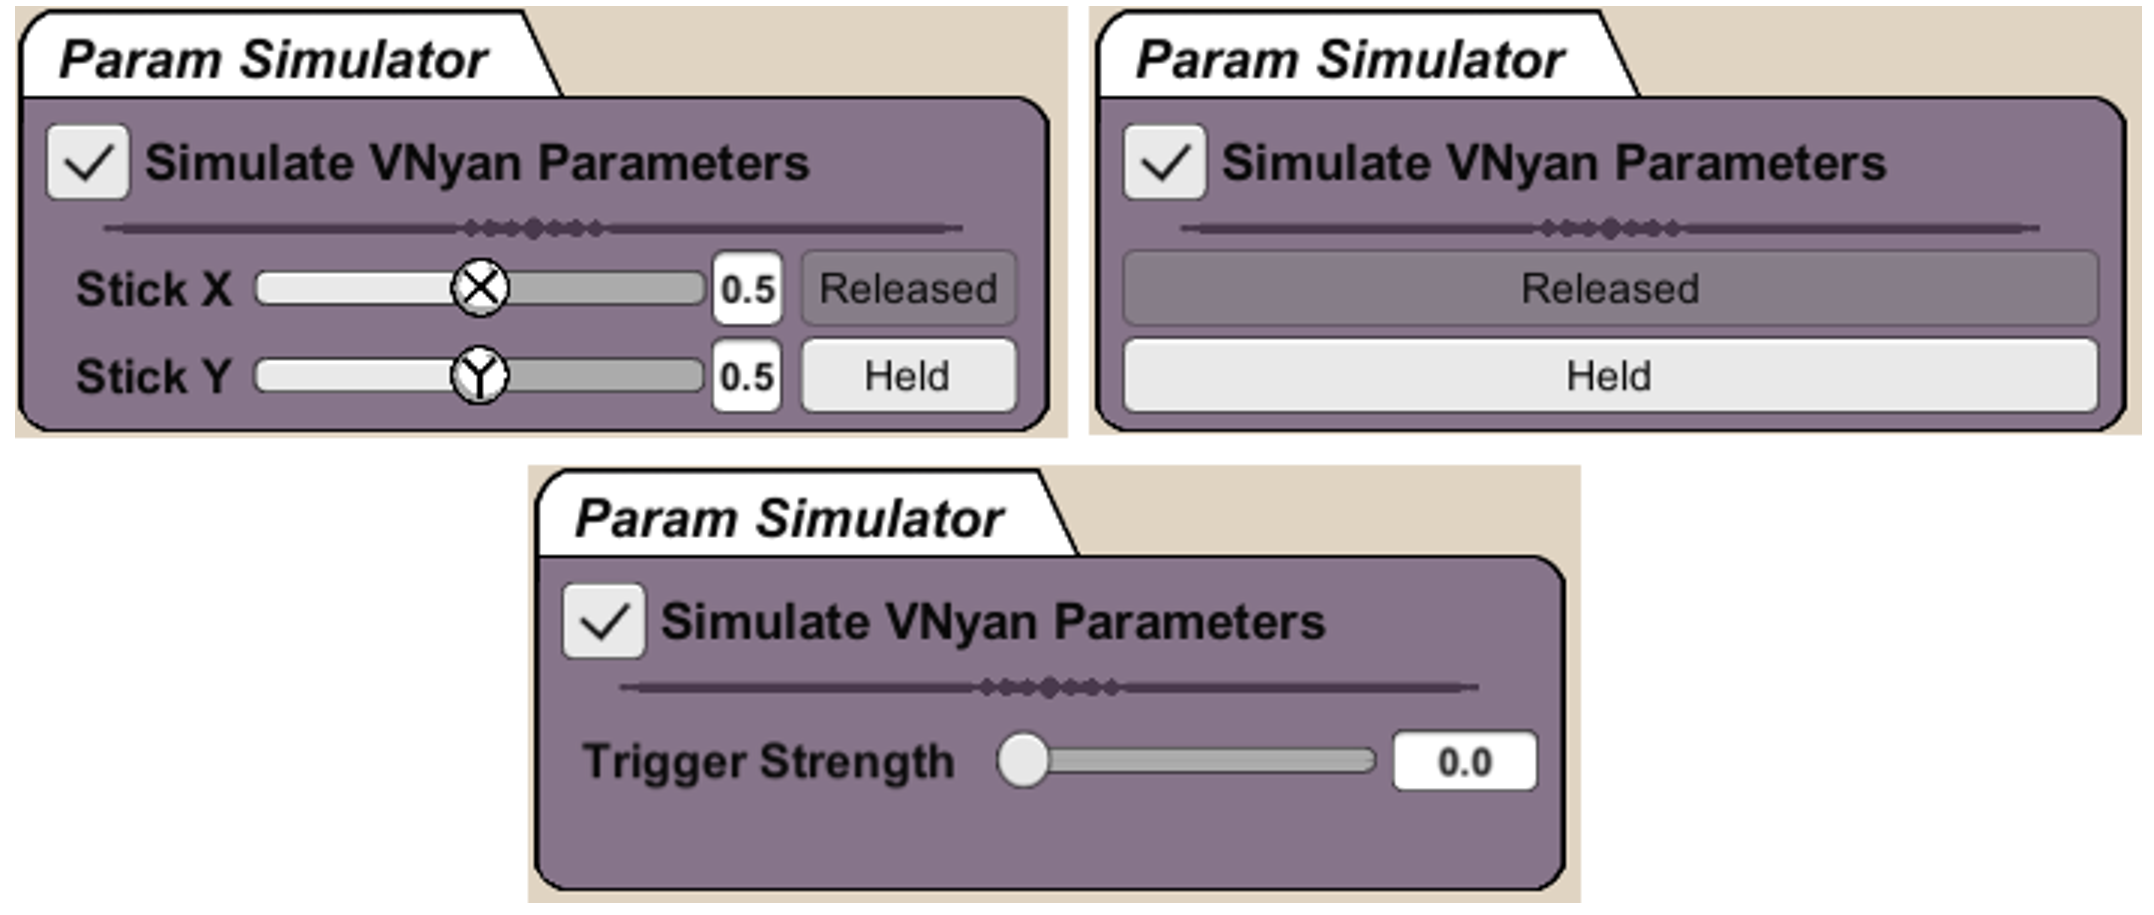
- Set the “Param Simulator” to Released (or Trigger Strength to 0). Before setting the finger rotations using the “Button Selector: Released” interface. Sliders are provided to rotate the Proximal, Intermediate and Distal joints.
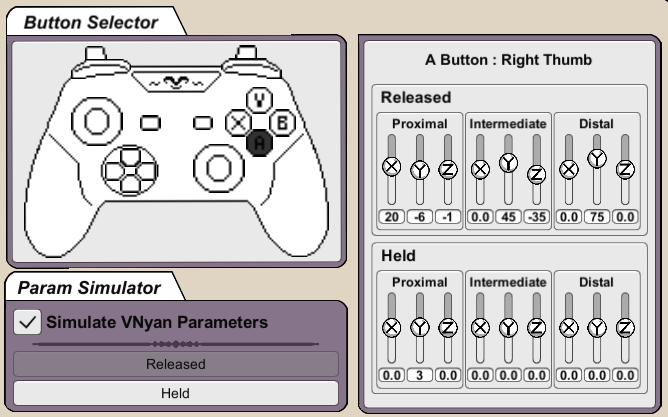
- Set the “Param Simulator” to Held (or Trigger Strength to 1). Before setting the finger rotations using the “Button Selector: Held” interface.
Depending on the selected button, one of three interfaces will be visible. • Select the button by clicking on the controller image in the “Button Selector” panel. • Set the vNyan parameter (by using the “Param Simulator” or pressing buttons on the connected controller). • Adjusting the button’s Released/Held state or Stick Movement parameters. • Repeat for each button on the controller.

- Setup the remaining controller animations by: • Select the button by clicking on the controller image in the “Button Selector” panel. • Set the vNyan parameter (by using the “Param Simulator” or pressing buttons on the connected controller). • Adjusting the button’s Released/Held state or Stick Movement parameters. • Repeat for each button on the controller.
- Use the “Param Simulator” to replicate controller movement (instead of using a connected controller). Activate this functionality using the “Simulate VNyan Parameters” toggle.
- Set the Transition time (in milliseconds) taken to move during each animation state.
- The Button transition is the time taken to move between animation states when pressing the controller Face, D-pad, Select and Release buttons.
- The Stick transition is the time take fro the thumbs to move to the thumb sticks as well as move on the thumb stick pads.
- The Trigger transition controls the speed of the fingers when pressing the controller trigger.